Rappelling for Beginners: A Comprehensive Guide
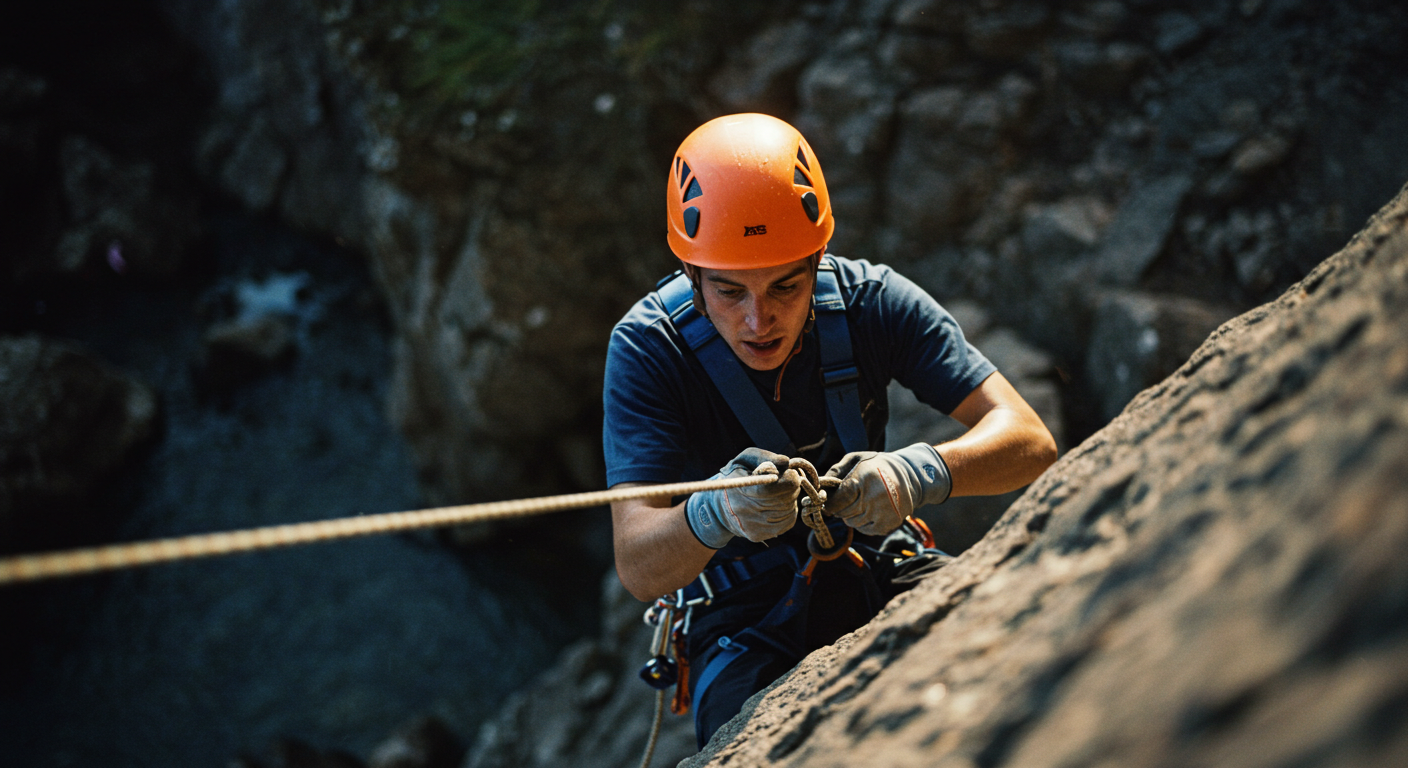
Ever felt that primal urge to conquer a challenge that goes beyond the horizontal plane? Perhaps you’ve dominated hiking trails and yearn for a new vertical adventure. Well, look no further than rappelling! This exhilarating activity lets you descend cliffs and rock faces using a rope system and specialized equipment. It’s a perfect blend of heart-pounding adrenaline and breathtaking views. Intrigued? This guide is your one-stop shop for everything a first-time rappeller needs to know.
Rappelling isn’t just an extreme sport reserved for climbers and rescue professionals; it’s a gateway to exploring hidden landscapes and remote terrains. Whether you’re looking to rappel down a canyon, a waterfall, or a rock face, understanding the fundamentals is key to a safe and enjoyable experience. Proper training, the right gear, and a respect for safety protocols will ensure that your descent is as smooth as possible.
What makes rappelling truly special is its accessibility. Unlike some extreme sports that require years of training, beginners can get started with proper instruction and guidance. From national parks to local climbing gyms, there are numerous places where you can practice and refine your skills before heading out into the wilderness.
What is Rappelling?
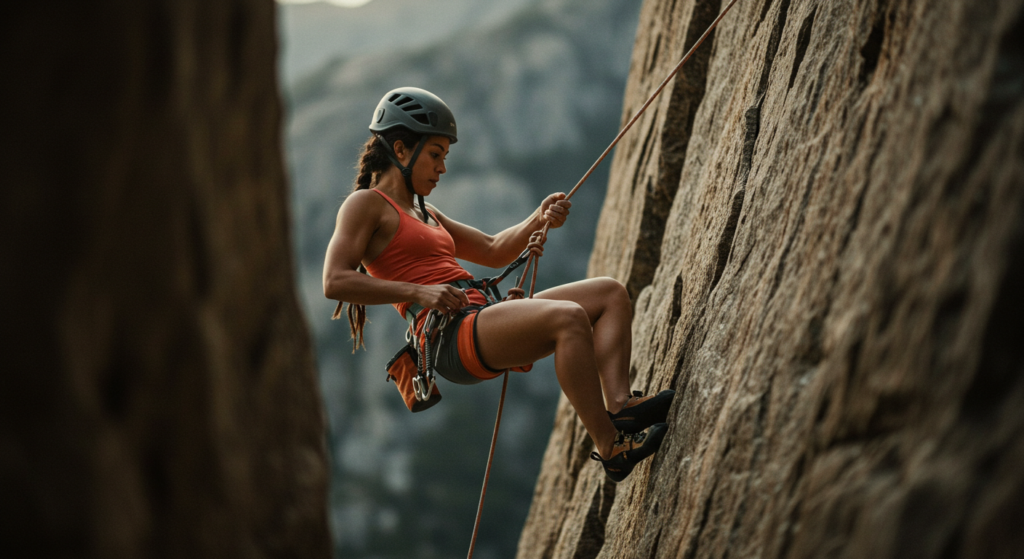
At its core, rappelling, also known as abseiling, is a controlled descent down a rock face using ropes and specialized gear. Unlike rock climbing, where the goal is to ascend, rappelling is all about coming down safely and efficiently. The technique is used across various outdoor activities, including canyoneering, mountaineering, and even tactical operations. Learning proper techniques and safety procedures will ensure you have an incredible experience while mitigating risks.
One of the most exciting aspects of rappelling is its versatility. You can rappel down towering cliffs, descend into deep caves, and even navigate waterfalls. It’s used by rescue teams, military personnel, and adventure enthusiasts alike. The sense of accomplishment that comes with a successful rappel is unmatched, making it an attractive challenge for outdoor enthusiasts of all levels.
Another major advantage of rappelling is that it provides access to places that would otherwise be unreachable. Whether it’s dropping into a hidden canyon or escaping a steep mountain pass, rappelling enables adventurers to explore and enjoy some of the most breathtaking landscapes on the planet.
Decoding the Dialect of Descent: Essential Rappelling Lingo
Before you toss yourself off the metaphorical cliff, let’s crack the code on some key rappelling lingo. These terms will become second nature as you navigate the vertical world, transforming you from a wide-eyed newbie to a bonafide “rope gunner” (that’s rappeller in climber slang).
- Anchor (The “Solid Stud”): This ain’t your average nautical anchor. Think of it as the “solid stud” of the operation. It’s a bombproof (extremely secure) attachment point, usually a series of connected carabiners (think metal D-shaped clips) clinging to the top of the cliff. This is where your trusty rappel line gets looped through, ensuring a safe and controlled descent.
- Belay Device (Your Personal Descent Brake): Imagine this bad boy as your own personal descent brake system. It’s a fancy friction device that, when used properly, regulates the speed of the rope as you make your way down. Think of it as the “downhill cruise control” that keeps you from becoming a human yo-yo. Popular choices include the GriGri+ or the Black Diamond ATC-XP – just ask your guide for the lowdown on these trusty tools.
- Rappel Line (Your Lifeline to the Ground): This one’s pretty straightforward. The rappel line is the single or double rope that serves as your lifeline to the ground. This bad boy is what you’ll be rappelling down, so you better treat it with respect. Always ensure it’s a dynamic climbing rope, which has the special ability to absorb shock in case of a fall, an essential safety feature!
- Carabiners (The Workhorses of Your Setup): These aren’t your grandma’s lobster trap clips! Carabiners are the workhorses of your rappelling setup. They’re those sturdy, D-shaped metal clips that connect all your equipment together. Think of them as the clasps that keep your rappelling life organized and, more importantly, secure. Locking carabiners are your best bet, as they ensure a screw-gate closure that prevents accidental opening, you don’t want these babies popping loose mid-descent!
- Harness (Your Essential Safety Net): This full-body harness is more than just a glorified pair of suspenders. It’s your essential safety net, cradling you comfortably and securely as you make your way down the cliff face. A good harness should feel snug but allow for some movement. Think of it as a supportive hug that keeps you connected to the rope system and, ultimately, the ground.
Gear Up and Go: Essential Rappelling Equipment for Beginners
Now that you’ve got the rappelling lingo down pat, it’s time to assemble your arsenal for conquering those vertical descents! Choosing the right equipment isn’t just about safety, it’s also about comfort and efficiency. A well-fitted harness can make the difference between a confident, enjoyable descent and an uncomfortable struggle. Similarly, a good belay device allows for a smoother rappel, giving you better control over your speed.
Investing in high-quality gear from reputable brands ensures durability and reliability in the field. You don’t want to be halfway down a cliff only to realize your equipment isn’t up to the task. Regularly inspecting and maintaining your gear will also extend its lifespan and keep you safe.
Here’s a breakdown of the essential equipment you’ll need for your first rappel adventure.
- Climbing Harness: Your trusty harness will be your anchor (pun intended) as you rappel down the rock face. It’s crucial to invest in a comfortable and certified harness that provides a snug fit with some room for movement. Here are a few options to consider:
- Black Diamond Momentum Harness: A popular choice for beginners, the Momentum Harness offers a balance of comfort, affordability, and durability.
- Petzl Avair Harness: Designed specifically for women, the Avair Harness features a breathable, contoured fit for a comfortable rappelling experience.
- Arcteryx R-3 Harness: For those seeking a more top-of-the-line option, the R-3 Harness boasts exceptional comfort and weight distribution, perfect for extended rappelling adventures.
- Rappel Rope: Your lifeline to the ground, the rappel rope demands the utmost respect. Choose a dynamic climbing rope designed to absorb the impact of a fall. Here are some trusted options:
- Beal Dynamic Rope: A great all-around rope, the Beal Dynamic Rope offers excellent durability and shock absorption at a reasonable price point.
- Edelrid Canyon Guide Rope: This dynamic rope is built to withstand the wear and tear of frequent rappelling use, making it a solid choice for guiding or commercial operations.
- Mammut Infinity Rope: For weight-conscious rappellers, the Infinity Rope from Mammut prioritizes lightweight construction without sacrificing safety or durability.
- Belay Device: Think of your belay device as your personal descent control system. This clever gadget regulates the speed of the rope as you rappel, ensuring a smooth and controlled descent. Here are a few beginner-friendly options:
- Petzl GriGri+: A popular and user-friendly choice, the GriGri+ assists with lowering the rappeller and automatically locks in case of a fall.
- Black Diamond ATC Guide: A more traditional belay device, the ATC Guide offers simplicity and efficiency, making it a great option for learning proper rope control techniques.
- Wild Country REVO: Another excellent choice for beginners, the REVO is the only automatically locking belay device which has a completely panic-proof locking mechanism..
- Locking Carabiners: These sturdy metal D-shaped clips are the workhorses of your rappelling setup, used to connect all your equipment together. Always opt for locking carabiners to ensure a secure connection – you don’t want these popping loose mid-descent! Here are some reliable brands:
- Edelrid Pure Screw Carabiner: A classic choice known for its durability and ease of use, the Pure Screw Carabiner features a screw-gate closure for maximum security.
- Black Diamond RockLock Screwgate Carabiner: This versatile carabiner offers a smooth screw-gate action and a good keylock design to prevent snagging.
- Petzl Attache Screw Carabiner: A lightweight option from Petzl, the Attache Screw Carabiner is perfect for weight-conscious rappelling adventures.
- Helmet: Rappelling isn’t all sunshine and rainbows; falling rocks or unexpected bumps are always a possibility. Protect your head with a certified climbing helmet like the Black Diamond Half Dome Helmet. Other reputable choices include the Petzl Vertex Vent or the Mammut Skywalker Helmet.
For trusted gear recommendations, check out REI’s climbing and rappelling equipment or Black Diamond’s harness and rope collection.
Basic Rappelling Technique
Before you take the plunge (literally!), mastering the basic rappelling technique is crucial for a safe and enjoyable experience. Here’s a breakdown of the essential steps to guide you down the rock face with confidence:
- Anchor Inspection – Safety first, always! Before even clipping into your rope, ensure the anchor is bombproof (extremely secure). This isn’t the time to take chances. If you’re unsure about the anchor’s integrity, don’t hesitate to ask your guide or instructor to double-check. A certified professional will ensure the anchor is set up correctly and can support your weight.
- Rope to Anchor – With a secure anchor confirmed, it’s time to connect the rope. This is usually done by clipping the rope to the anchor using a locking carabiner (remember, double-check that it’s locked!). Your guide will walk you through the specific carabinering technique for a secure connection.
- Harness Up – Now, it’s time to suit up! Put on your harness and ensure it fits snugly but comfortably. A good harness shouldn’t restrict your movement but provide a sense of security. Don’t be afraid to ask for help with adjusting the fit for optimal comfort and safety.
- Harness to Rope – Connecting yourself to the rope system is paramount. There are different methods for attaching the rope to your harness, such as a secure knot like a figure-eight knot. Your guide will demonstrate the proper knot-tying technique and ensure a secure connection before you proceed.
- Equipment Check – Before taking that first step down, take a deep breath and perform a thorough equipment check. Double-check that your carabiner is locked, your knot is secure, and the rope isn’t twisted or tangled. A quick visual inspection and a gentle tug on the rope can give you peace of mind.
- Geared Up and Guarded – Safety never sleeps! Put on your helmet to protect your head from any falling debris, and don your gloves to prevent rope burn as you descend. These simple steps can make a big difference on your rappelling adventure.
- The Descent Begins – Now comes the exciting part! With your guide by your side and your equipment checked, slowly begin your descent down the rope. Remember, it’s all about control. Use your belay device to regulate your speed; a smooth, controlled descent is key.
- Leg Power – Don’t just hang limply! Use your legs to control your descent. Keep your weight on your feet and lean back slightly to slow yourself down. Imagine rappelling as a controlled walk down a vertical wall, not a freefall.
- Your Belay Device is Your Friend – Your belay device is your partner in crime during the descent. Use it to maintain a safe and controlled pace. Your guide will instruct you on the proper technique for using the belay device to ensure a smooth and enjoyable experience.
- A Successful Descent – Congratulations! You’ve reached the bottom! Once you’ve safely landed on your feet, detach the rope from your harness following your guide’s instructions. Take a moment to celebrate your accomplishment; you’ve just conquered your first rappel!
Remember, this is a simplified breakdown. One of the most important aspects of rappelling is staying calm and focused. Even seasoned rappellers take a moment to mentally prepare before descending. If you’re feeling nervous, take a deep breath, double-check your gear, and remind yourself that every step is about maintaining control.
Practicing on smaller cliffs before tackling bigger descents is highly recommended. This builds confidence and ensures that you are familiar with handling your equipment in real-world conditions.
For a visual guide, watch this instructional video by the American Alpine Club.
Where to Find Your First Rappelling Fix
The thrill of your first rappel is unmatched, the controlled descent, the stunning views, the sense of accomplishment. But where do you find the perfect spot to test your newfound skills? The US is peppered with incredible locations that cater to beginner rappellers. Remember, for your safety, it’s always recommended to seek out a qualified guide or instructor on your first expedition. Here are a few suggestions to get your rappelling journey started:
Red River Gorge, Kentucky: This climber’s haven boasts some of the world’s best climbing routes, and thankfully, that includes beginner-friendly rappelling opportunities. Imagine rappelling down towering sandstone cliffs overlooking the Red River, with breathtaking panoramic views as your reward. Numerous guiding companies offer introductory rappelling courses, making Red River Gorge a perfect location for your first descent.
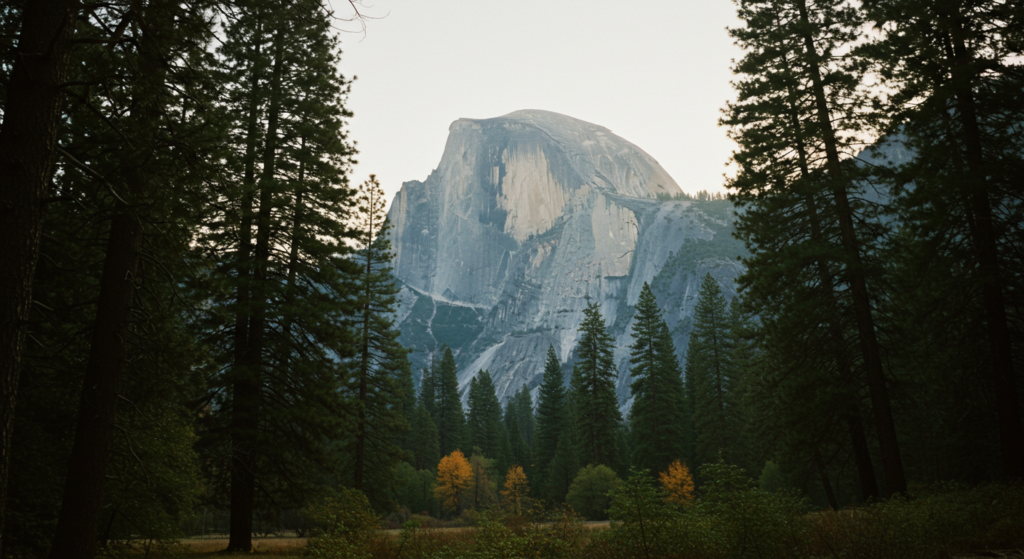
Yosemite National Park, California: Yosemite’s majestic granite cliffs are legendary, and thankfully, some of them are accessible for beginner rappellers. Under the watchful eye of a certified guide, you can experience the thrill of rappelling down iconic formations like Lower Yosemite Fall or El Capitan Meadow. Imagine the bragging rights – “I rappelled down Yosemite!” – enough said.
Clear Creek Canyon, Arizona: Nestled near Sedona, this hidden gem offers a variety of beginner-friendly rappelling routes with stunning views of red rock canyons and cascading waterfalls. The shorter descents and gentle slopes make Clear Creek Canyon an ideal location for first-time rappellers to build confidence and technique. Several local outfitters offer guided rappelling tours, ensuring a safe and informative experience.
French Broad River Gorge, North Carolina: This scenic gorge near Asheville boasts a variety of rappelling routes catering to all skill levels. Beginners can find gentle descents alongside cascading waterfalls and hidden swimming holes, making it a perfect introduction to the world of rappelling. Several reputable guiding companies offer introductory courses with a focus on safety and proper technique, ensuring you have a blast while learning the ropes (pun intended).
Moab, Utah – Moab is one of the premier rappelling destinations in the United States, offering a mix of dramatic sandstone cliffs, towering arches, and hidden slot canyons. Adventurers can experience thrilling descents at locations such as Corona Arch and Morning Glory Arch, where the stunning red rock formations provide a breathtaking backdrop. Moab’s desert landscape, combined with its dry climate, makes it an ideal year-round destination for rappelling enthusiasts. If you’re looking for guided experiences, Moab Cliffs & Canyons offers professional instruction and guided rappelling tours tailored for all skill levels.
North Cascades, Washington – For those who crave a more rugged and alpine experience, the North Cascades in Washington offer a spectacular mix of rappelling adventures. This region is home to dramatic mountain landscapes, cascading waterfalls, and deep glacial valleys, providing plenty of opportunities for vertical exploration. Popular locations such as Mt. Index and Bridal Veil Falls allow rappellers to descend alongside rushing waterfalls, creating a thrilling and scenic experience. The North Cascades’ diverse terrain makes it a great destination for both beginners and advanced adventurers. Those looking for guided trips and training can check out Mountain Madness, a reputable outfitter specializing in alpine rappelling and climbing expeditions.
Every location presents unique challenges and scenery. Rappelling in the desert, for example, differs from descending a lush, waterfall-laden gorge. Researching your location ahead of time and practicing in a controlled environment will ensure you’re prepared for any terrain.
Guided trips provide a great way to gain experience with the support of trained professionals. Find more guided rappelling trips through Mountain Skills Academy.
Safety First: Common Mistakes to Avoid
- Skipping the Equipment Check: Always double-check your gear before starting.
- Not Practicing on Small Cliffs First: Build confidence before attempting higher descents.
- Improper Foot Positioning: Keep feet planted to maintain control.
- Ignoring Weather Conditions: Wet or windy conditions can increase danger.
- Not Using a Backup System: Consider using an autoblock hitch for extra safety.
Safety should never be taken lightly in rappelling. Even experienced climbers and rappellers make it a habit to double-check their anchors and gear before starting a descent. Treat every rappel as a new challenge and never become complacent.
Understanding emergency procedures and carrying a first-aid kit is also a wise precaution. Knowing what to do in case of an equipment failure or injury can make all the difference in an outdoor setting.
A World of Vertical Exploration Awaits
Rappelling isn’t just a descent; it’s a doorway to a whole new perspective on the outdoors. It’s a chance to conquer challenges that go beyond the horizontal plane, to explore hidden waterfalls and secluded canyons, all while experiencing the thrill of controlled movement down a vertical landscape.
This journey you’ve embarked on, learning the lingo, assembling your gear, and mastering the basic technique, is just the first step. Now, it’s time to translate this knowledge into action. Seek out a qualified guide, find a breathtaking location, and take that first exhilarating descent. You’ll be surprised by the sense of accomplishment, the surge of adrenaline, and the newfound confidence that comes with conquering a vertical challenge.
But remember, safety is paramount. Practice in a controlled environment under the watchful eye of a professional before venturing out on your own. Always follow proper safety procedures, prioritize double and triple checks, and never hesitate to ask questions. Every great rappeller started as a beginner. Don’t be discouraged by nerves or the learning curve. With time, patience, and practice, you’ll soon find yourself rappelling down cliffs with ease and confidence.
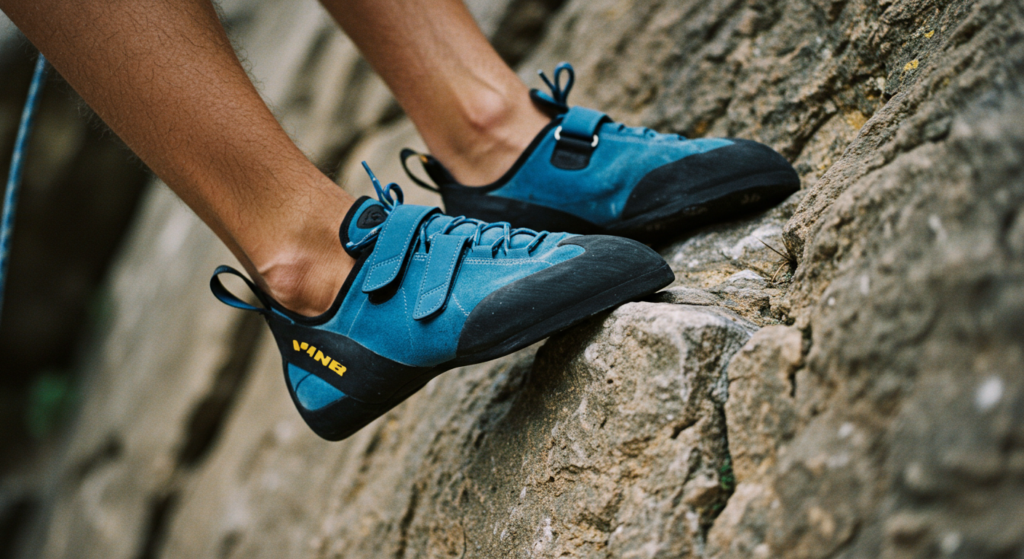
Rappelling isn’t just a sport; it’s a journey of self-discovery. It’s about pushing your boundaries, trusting your equipment and your guide, and reveling in the breathtaking views that await you at the bottom. So, lace up your boots, grab your gear, and get ready to experience the world of rappelling. A world of hidden canyons, cascading waterfalls, and vertical adventures awaits!
Happy rappelling, and may your descents be smooth, controlled, and filled with unforgettable memories.